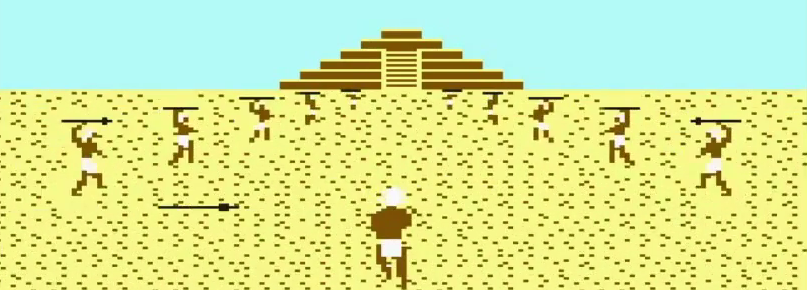
We will be making the first level of the classic Aztec Challenge game originally released in 1982 on the Atari 8-bit computer, then on the Commodore 64 in 1983. Check the Wikipedia link for more details.
https://en.wikipedia.org/wiki/Aztec_Challenge
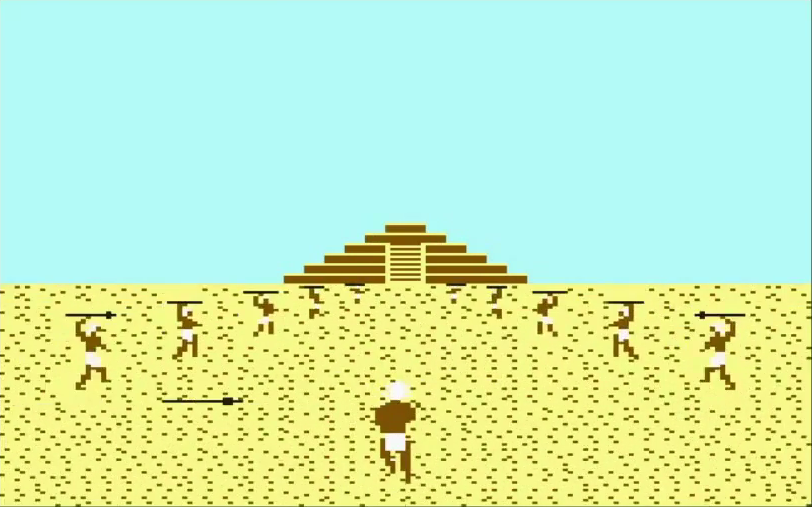
The game consisted of multiple levels we would be making only the first level, which consisted of a brave Aztec warrior running towards a temple. His road was surrounded by Aztec spearman (bad guys) throwing spears at him. The spears could come at head level or feet level from both left and right directions. The warrior should avoid the spears either by jumping at the right time or ducking them.
The completed game will look like this:
Think of the Mell Gibson movie Apocalypto but the bad guys located on both sides of the villager escape route.
Check out this YouTube video:
WARNING: This video contains graphic content and may be upsetting to some people.
Start Construct 2 and select the New → New Empty SD landscape 16:9 project.
![]()
Rename New Project → Aztec
Rename the Layout 1 → gameLayout
Rename the Event Sheet 1 → gameEvents
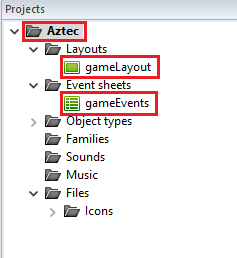
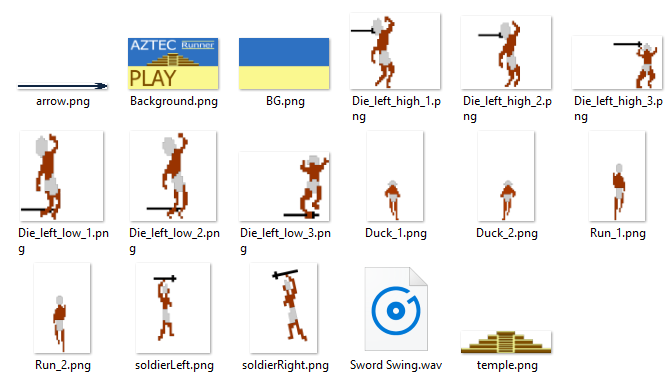
Save the project to a new folder and unzip the Aztec_Asset.zip into that folder – It should create an Asset folder that contains all these items.
Right-click anywhere on the Layout screen and select Insert new object.
Load the BG.png file and place it on the screen centered. (427, 240 if you have the origin of the BG.png centered)
Nam the sprite: background

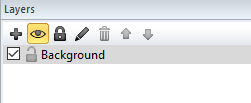
Also, name the layer: Background
Insert a new Sprite and select the temple.PNG from the load menu.
Right-Click on the Origin → Quick Assign → Middle.
Right-Click again on the Origin → Quick Assign → Bottom.

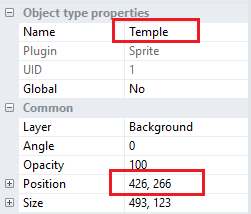
Name the sprite Temple and position it at (426,266).
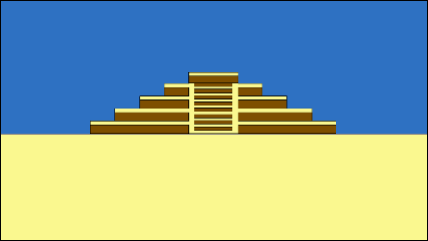
Your screen should look like the below:
Lock the Background Layer Create a new layer and name it Game.

We import 3 more sprites (you can place these outside the visible layout area):
- Arrow.png → Name it Arrow.
- soldierLeft.png → Name it soldierLeft.
- soldierRight.png → Name it soldierRight.
Click the Arrow sprite and click the Behaviors in the property window.
When the Behavior window appears click on the Plus and select the Bullet behavior.
Set the Speed property to 450.
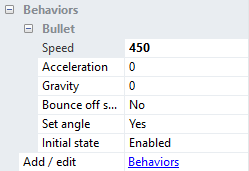
Click on the soldierLeft sprite and open the behavior window and add the Bullet behavior and Destroy outside layout behaviors.
For the Bullet property set Speed to 350.
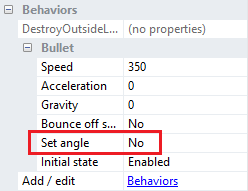
Change the Set angle property to NO.
In the Size Property set Width to 85 and Height to 115.

Similarly, for the soldierRight add the Bullet and Destroy outside Layout behaviors.
Set Speed of Bullet property to 350.
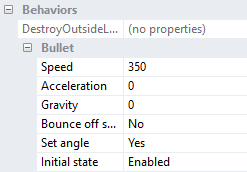
Keep the Set angle property Yes.
Set the in the Size property the width and height to 85 and 103 respectively.

Extra Notes: The soldierLeft and the soldierRight sprites are supplied in large sizes so that you can make easily any adjustments you want to them.
Let’s move to gameEvents tab.
Go to Add event → System à On start of layout
It always a good idea to destroy sprites you don’t need in the On start of layout – so we will destroy the Arrow, soldierLeft and soldierRight.
Click on the Add action next to the On start of layout and select the Arrow then select Destroy.
Similarly click on Add action again, select solderLeft → Destroy and click on Add action → soldierRight → Destroy.
When you finish your On start of layout should look like this:

While the player is alive he is running towards the temple. So, at constant interval we must generate soldiers that move from the temple to the side of the screen to simulate the running process.
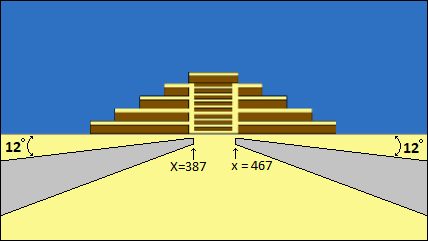
In the below picture the gray area shows where the soldiers should appear and the size of the gray area show their change in size as they move outward.
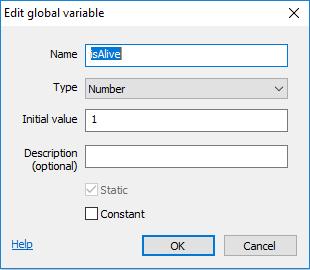
We will create a global variable and name it isAlive and set its value to 1.
Later, when we develop the player logic and the player dies we will set the value of isAlive to zero.
Right-click anywhere in the event sheet and select Add Global variable – name it isAlive and set its value to 1.
The idea is that we want to animate the arrow and soldiers on the left and the right if the player is alive (isAlive=1).
Every 0.35 seconds we want to generate a right and left solders.
Why 0.35 seconds – well I tried other values (0.1 to 1.5) and the most natural speed seemed to be 0.35 seconds. Feel free to experiment with this value and select the one you like.
Click Add event → System → Every X seconds and specify 0.35 for the Interval (seconds) value.
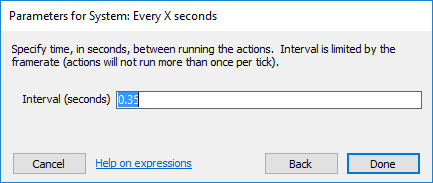
Right-click on the created entry → Add → Add another condition and select System → Compare variable.
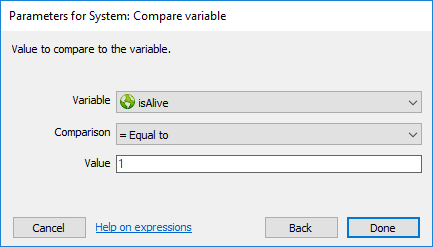
Specify isAlive as variable and 1 its value.
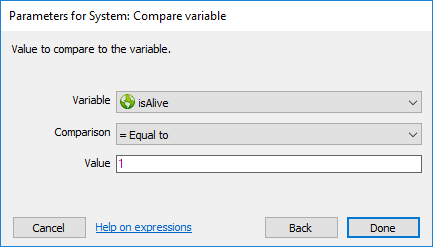
The 2 combined events should look like this:
![]()
We want to create a soldierRight at around x=467 position, set it scale to 0.05 and set it bullet angle to 12 degrees.
Click Add action → System → Create Object. Select soldierRight, Layer=0, X=467 and y=275.
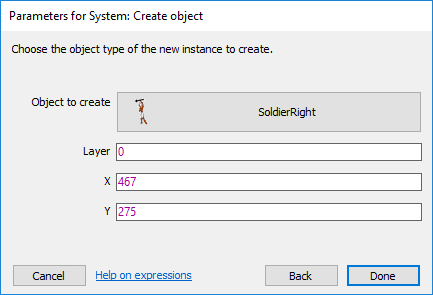
Click Add action again → Select soldierRight → Set scale and specify 0.05 value.
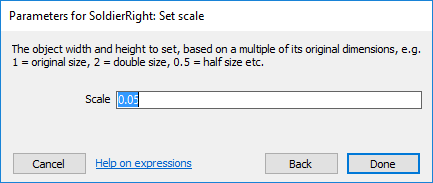
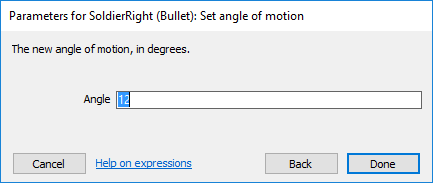
Click Add action again → Select soldierRight → in the bullet section select Set angle of motion and specify 12.
At this point if you run the game you should see multiple soldiers being created on the right side and they slide off the screen.
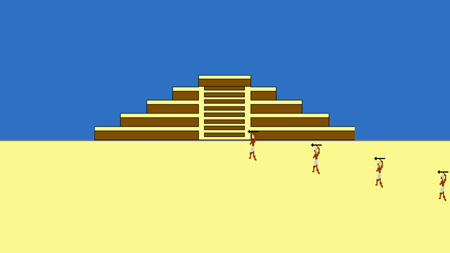
To make it slightly more realistic we need to increase the size of the sprite as it moves towards the right side. To do that we will create and Every tick event and increase the width and height of the soldierRight by a certain scale.
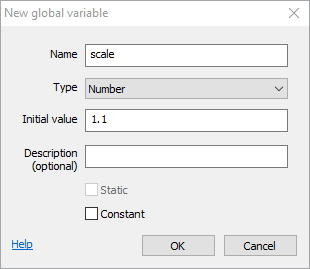
Right-click anywhere and select Add global variable – name the variable scale and set its numeric value to 1.1.
Click Add Event and select System → Every Tick.
Right-click on Every tick created event, select Add → Add another condition → System → Compare variable. Specify isAlive and compare it to 1.
Our newly created Every tick block should look like this:
![]()
In this event, we want to increase the Height and Width by scale(scale=1.1) on every tick.
Click Add action → soldierRight → Set height → specify value solderRight.Height + scale.
Click Add action again → soldierRight → Set width → specify value soldierRight.Width + scale.
![]()
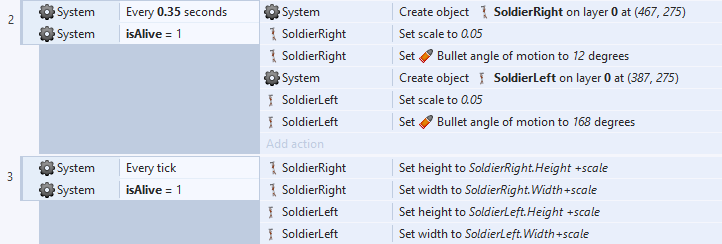
Let us create the soldierLeft also. 2 Things to remember:
- The initial creation position should be at x=387.
- The bullet angle should be 168 (which is 180-12).
And after adding the set Height and Width actions for Every tick it should look like this:
Let us create the player now.
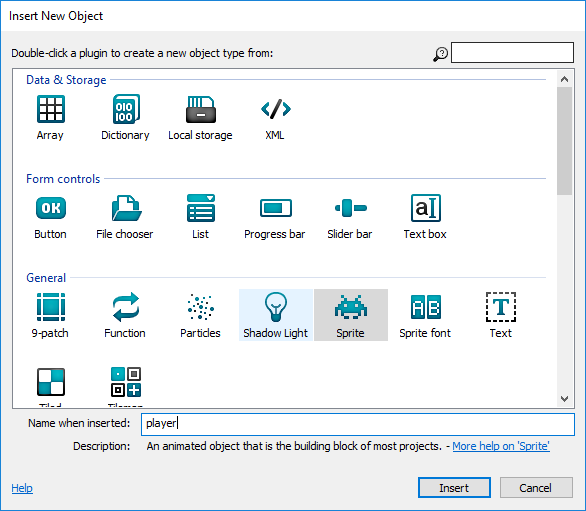
Right-click anywhere and select Insert new object à Select the Sprite and name it player then click Insert.
Click anywhere on the screen and select the open image from file button and load the Run_1.png file from the Assets folder.
Right-click on the default in the Animation window and rename it to Run.
Right-click on the Animation Frames window and Add frame.
Go to the Edit image window and load Run_2.png.
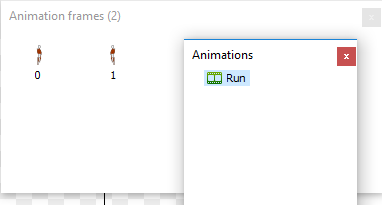
The Animation Frames and the Animation windows should look like this:
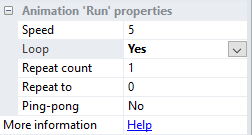
Click on the Run (in the Animation window) and set the Loop property to Yes.
Close the Edit image window.
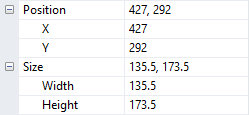
Set the width and height of the player to 136.5 and 173.5 respectfully.
Also, set its x and y position to 427 and 292.
If you run the game now, the player will be displayed on the screen running.
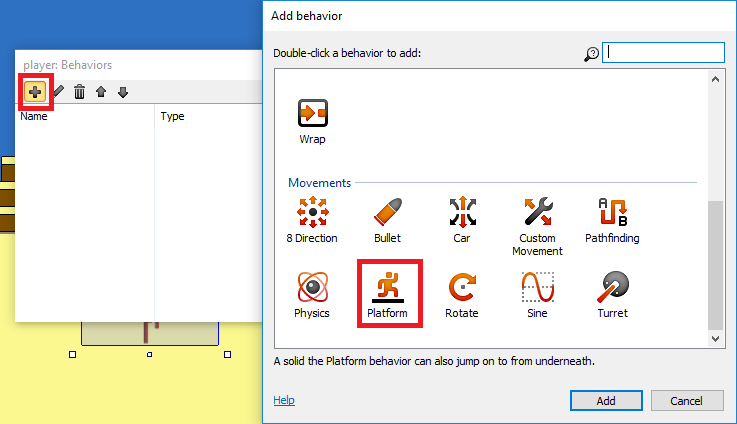
Select the player and click on the Behavior, click on the plus sign and add the Platform behavior.
If you run now the player will fall outside the visible area.
Let us create a platform for the player to stand on.
Right-click anywhere on the screen and select Insert new object àSelect Sprite and name it stand.
Make it size equal to 250 by 17.
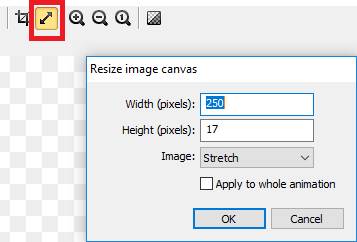
Fill it in any color you want (it won’t matter as we will make its opacity=0 later).
Set its position to x=425 and y=470 and add a Solid behavior to it.
If you run the game now you might see something like this:
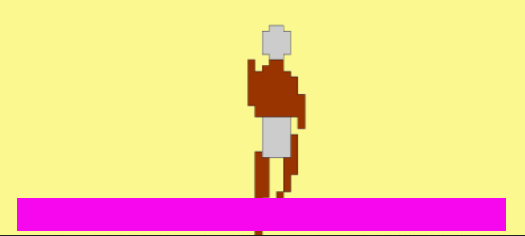
We want our player to stay on the stand sprite and not fall through it.
To fix this:
-
- Double click the stand sprite and make sure that the Set collision polygon is the same size as the rectangle.
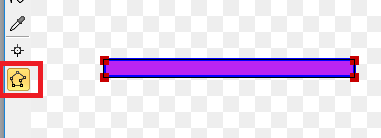
- Double click on the player and adjust its collision polygon for the 2 frames (0 and 1) to something like this:
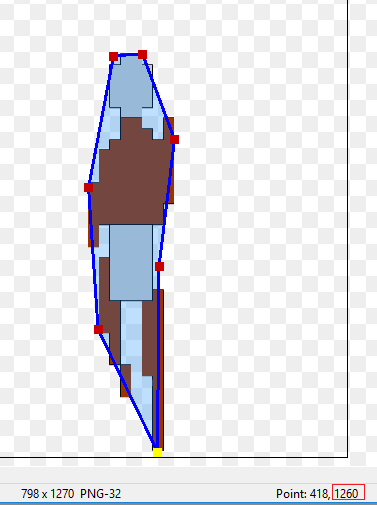
- Double click the stand sprite and make sure that the Set collision polygon is the same size as the rectangle.
Make sure that the lowest point (in both frame 0 and 1) are set at the bottom of the player feet.
Also, make sure that the whole body of the player is covered from head to toe (as this polygon is important when the player receives hits from the arrows). Feel free to add additional polygon point to give an accurate presentation.
Click on the stand sprite and set its opacity to 10 (we will set it to zero later).
Run the game, the player will appear as if it is standing on the stand sprite. Use the keys to move the player (the up key to jump and the left and right keys to move sideways).
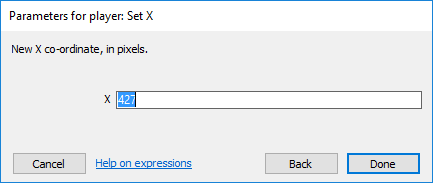
We don’t want the player to move sideways so we go to the Every tick event and set the x position of the player to 427.
Click Add action in Every thick event group à Select playerà Set X and specify a value of 427.
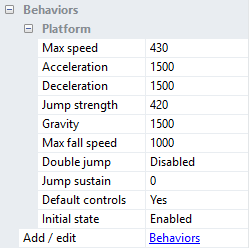
We want to adjust the jumping of the player to make it more natural. Click on the player sprite and in the behavior properties adjust the following:
Max speed=430
Jump strength= 420
Double jump= Disabled
We will return to the player and program the touch, keyboard and the duck feature (to avoid arrows), but for now let us move to the arrow.
Things we need to do:
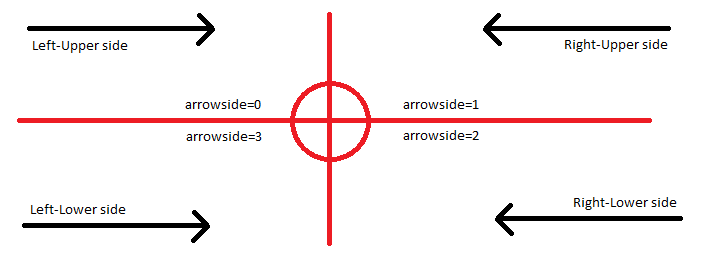
Every 5 seconds we will generate an arrow randomly from one of the 4 possible positions.
We will store the random value in a variable called arrowside and it can have a value from 0 to 3 where:
0 – Left-Upper side
1 – Right-Upper side
2 – Right-Lower side
3 – Left-lower side.
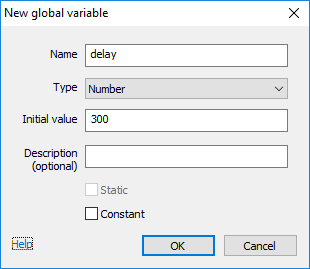
We want to create a global variable called delay and assign it a value of 300. Then in every tick reduce the value of delay by 1. Since every tick fires about 60 times per second the delay value will become less than zero in about 5 seconds.
When delay is less than zero we will generate randomly an arrow and reset the value of delay to 300 again.
You might be tempted to use Every 5 second event, but Every 5 second event starts calculating from start of game play. We are using the delay variable to make sure that counting starts from start of layout.
Right-click anywhere in the event sheet and select Add global variable. Name it delay and set its numeric value to 300.
Let create the arrowside global variable in a similar way and assign its numeric value to zero.
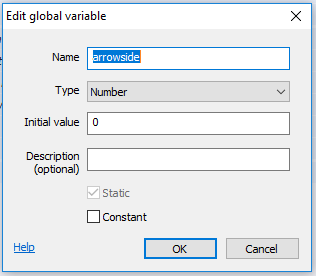
Arrowside must be a global variable because when the player dies we want to generate the death animation based on the arrowside value.
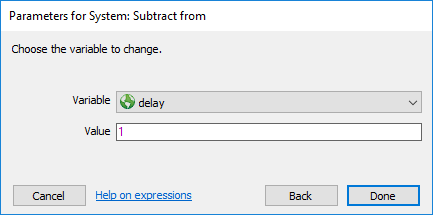
Go to Every tick event and add a new action: System → Subtract from and specify delay as the variable and 1 as the value.
Click Add event → System → Compare variable → Specify delay as the variable, Less than or equal as the comparison and zero as value.
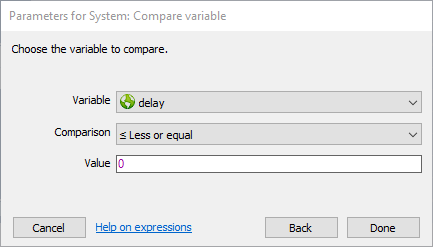
Right-click on the newly created event, select Add → Add another condition → System → Compare variable, specify isAlive as variable 1.
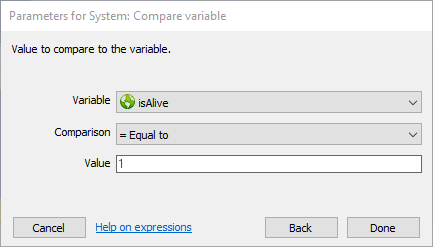
Our events should look like this:
![]()
Let us import the sound effect for the arrow – Right-click on the Sounds folder in the project hierarchy and select Import sounds.
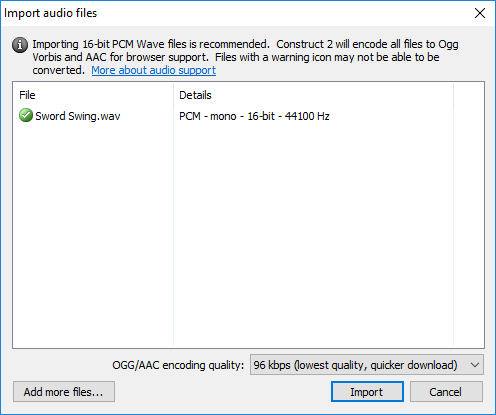
Click Import, then Ok on the next screen.
In the game view right-click anywhere → Insert new object → Select the Audio from the Media group → Click insert.
We want to assign a random value between 0 and 3 to the arrowside variable.
Click on the Add action next to the recently added event group (delay<=0).
System → Set value → select arrowside and set value to choose(0,1,2,3).
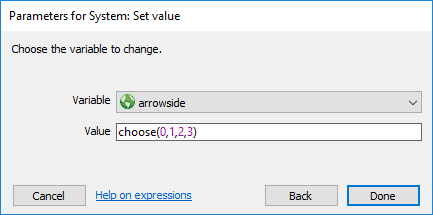
The choose function is very similar to the random function, basically it will select randomly one of the values supplied each time it is called.
Add action → System → Set value → select delay and set its value to 300.
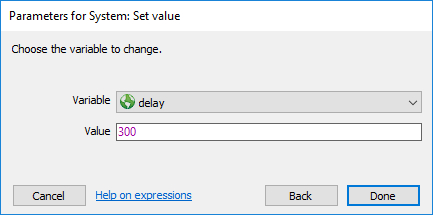
Our complete event line should look like this:

We want to write the code for the 4 cases (0,1,2,3) – Right-click on the location of the red arrow and select Add → Add sub-event → System → Compare variable and specify as variable arrowside and as value equal to 0.
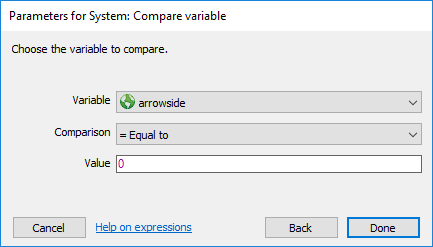
You can repeat the above steps 3 more time each time specifying the value of 1,2,3 or copy the above created line and paste it 3 times and then changes the values.
We should end up with something like this.

Arrowside=0 is when the arrow should come from the Left-Upper corner.
Click on Add action of that event group → System → Create object – Specify Arrow as object set x=-51 and y=380.

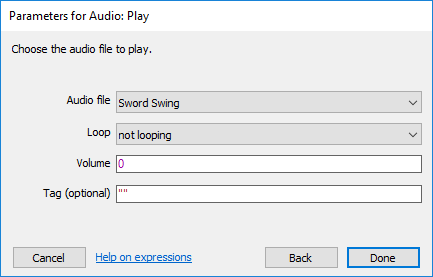
Click on Add action → Audio → Select Sword Swing → Click Done.
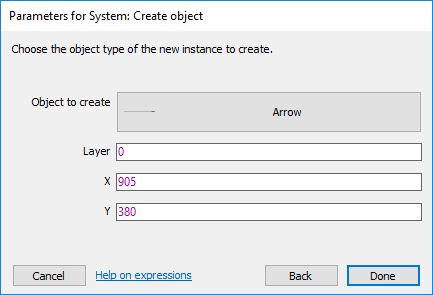
Arrowside=1 is when the arrow should come from the Right-Upper corner. Click on the Add action of that event group àSystem à Create object – Specify Arrow as object set x=905 and y=380.
The arrows that are coming from the right side we have to flip the bullet angle by 180 degree.
Click on Add action → Select arrow → Set angle of motion (from the bullet group) and specify a value of 180.
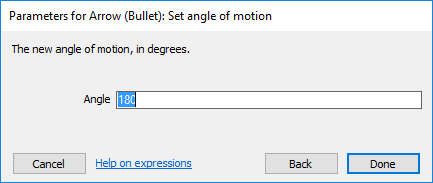
Click on Add action → Audio → Select Sword Swing → Click Done.
Complete the actions for arrowside=2 and arrowside=3. When you finish, your complete section should look like this:
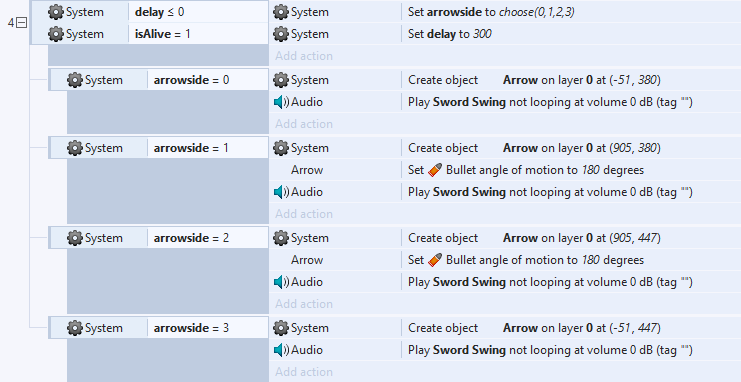
Run the game – you should see the arrows randomly generated every 5 seconds from one of the possible 4 positions.
Any object that is no longer needed must be destroyed – Otherwise they will create a lag and slow down the performance of the game. Usually we use the DetsroyOutsideLayout behavior to accomplish that, but since the arrows are created outside the layout the behavior can’t be applied to them.
We will create 2 objects, placed on the left and the right sides, outside the visible area and when the arrows hit them they will be destroyed.
Go to the gameLayout, Right-click anywhere and select Insert new object – Select Sprite and name it destroyer – make it any color you want. Make it width=32 and height=102, and place it at position x=-144 and y=432.
Right-click on the object and select Clone object type then click anywhere to create a clone(destroyer2).
Set the position of destroyer2 x=998 and y=432.
Go to the event sheet and click Add event – Select Arrow → Is overlapping another object and select destroy object.
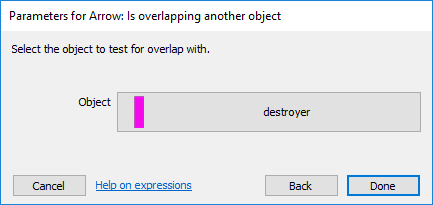
Click on the Add action and select arrow à Destroy.
Again, click Add event – Select Arrow → Is overlapping another object– select destroyer2.
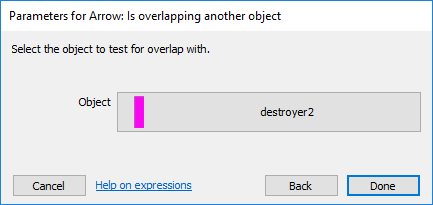
Our arrow destroying events should look like this:

We go back to our player – we still must:
- Add the ducking animation
- Add touch and keyboard support
- Add the death logic
- Add the score and high score system.
- Add the death animations.
Add the ducking animation
Double click the player to open the edit image windows. In the Animation window (below the run) Right-click and select Add animation.
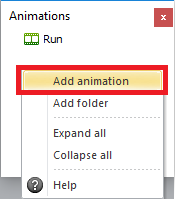
Name the animation Duck and select it.
In frame 0 of this animation Load the Duck_1.png then add another frame and load Duck_2.png.
While the duck Animation is selected change the value of Loop to Yes in the properties.
Add touch and keyboard support
Right-click anywhere in the gameLayout and select Insert new object and select the Keyboard from the input group.
Right-click again and select Insert new object and select the Touch from the input group.
Since the player has the platform behavior the up arrow (on the keyboard) will simulate a jump. However, we want our game also playable on mobile devices so we will add 2 areas to the layout to trigger jump and duck when touched.
Right-click anywhere in the gameLayout → Insert new object → Select Sprite and name it touchLeft.
Give it a bright green color. Return to the gameLayout and change it size to width=287 and height=407.
Place it on the left-lower corner of the gameLayout.
Right-click on it and select Clone Object type. Click anywhere to clone its set size to width=287 and height=407 and set its position to the right lower corner of the gameLayout. Name this one touchRight.
Your screen should look like this:
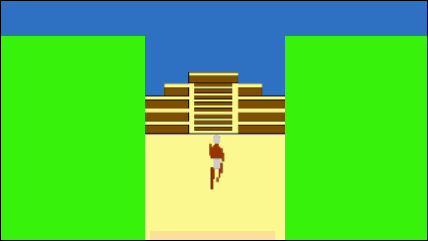
Select touchLeft and in property windows set opacity=20, then select touchRight and set opacity =20. (we will set opacity=0 when we finalize our game).
The stand, touchLeft and touchRight should not be visible when the game is running. However for now set their opacity values to 10 or 20 so that we can see them at design time.
We want to use touchLeft or jumping.
In the event sheet select Add even → touch → Is touching object → Specify the touchLeft object.
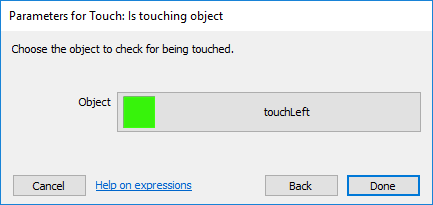
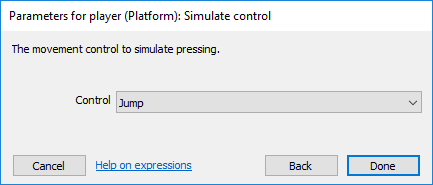
Click on the Add action → Select player → Simulate control → Select Jump.
We are going to write the event for touchRight and the down arrow for the ducking.
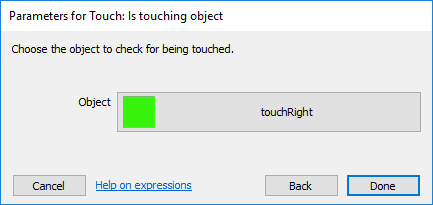
Click Add event → Touch → Is touching touchRight.
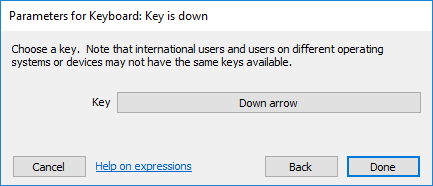
Right-click on the left side of this created event and Select Add → Add another condition → Select keyboard → Key is down → Click on the key to Choose and hit the down arrow.
Now click the Right-click the block of the touch and keyboard and select make ‘or’ block.
Click on the Add action → Select player → Set Animation → Specify “Duck” as animation name.

You can run the game. If you hit the down key or click on the touchRight and the player appears to be overlapping the stand object.
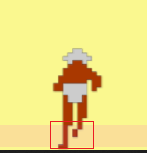
We need to adjust the Collision polygons for the 2 frames of the duck Animation – make sure that the lower points of the polygon are exactly at the level of the feet of the player. Feel free to add point to give an accurate polygon shape.
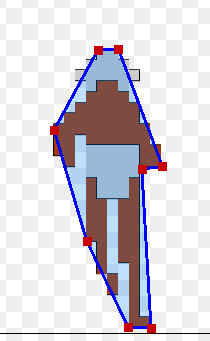
If we run now the player appears to be on the stand when we duck.
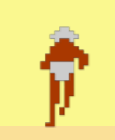
Notice one other thing – When we duck the animation stays on the ducking position – we must inform construct that when we end touching the screen or when we release the key the player should always revert to the running animation.
Click Add event → Touch → On any touch end.
Click on Add action → Select player → Set animation → Specify “Run” in the animation name.
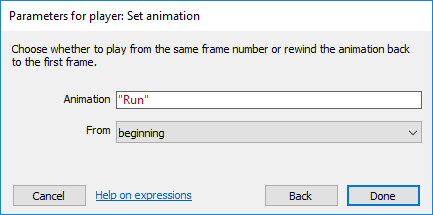
Click Add event again → Select keyboard → On any key released.
Click on Add action → Select player → Set animation → Specify “Run” in the animation name.
The complete touch and keyboard support code should look like this:

Add the death logic
If the arrow hits the player à player dies.
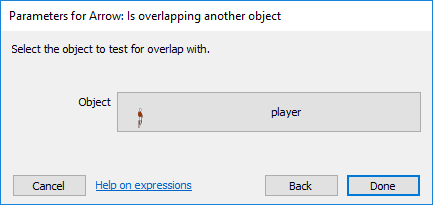
Click Add event → Arrow → Is overlapping another object → Select player.
Actions to perform when player dies.
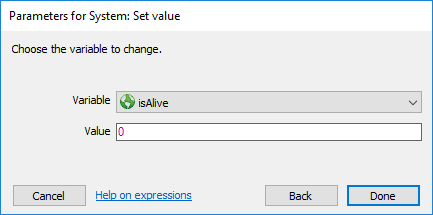
Set isAlive=0
Click Add action → System → Set value isAlive=0
Click Add action → player → Destroy.
Click Add action → Arrow → Destroy.
Click Add action → soldierRight → Set speed = 0
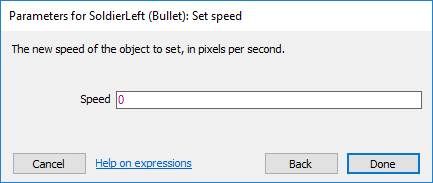
And similarly Add action → soldierRight → Set speed=0.
Our complete Arrow overlapping player section (death of player) should look like this:

Add the score and high score system.
Right-click anywhere in the event sheet → Add global variable → name it score and set its numeric value to 0.
Right-click again → Add global variable → name it highScore and set its numeric value to 0.
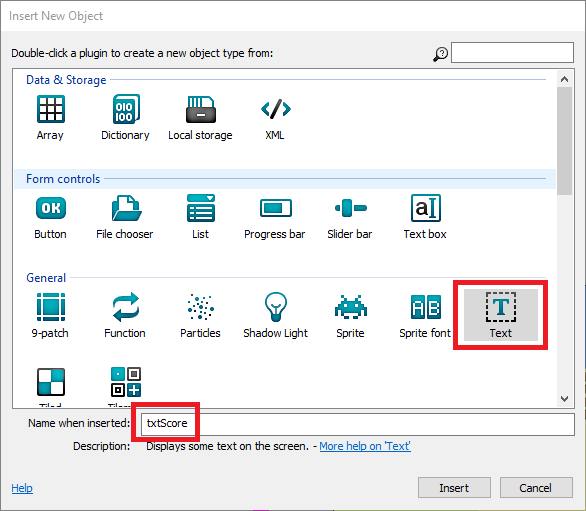
Right-click anywhere in the gameLayout → Insert new object → select Text and name it txtScore.
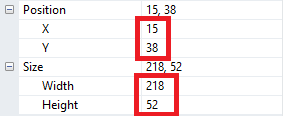
For the txtScore, set position(15,38) and size(218,52) to:
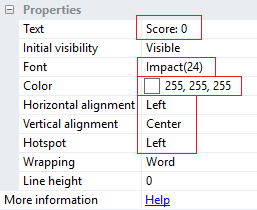
And set the other properties as indicated:
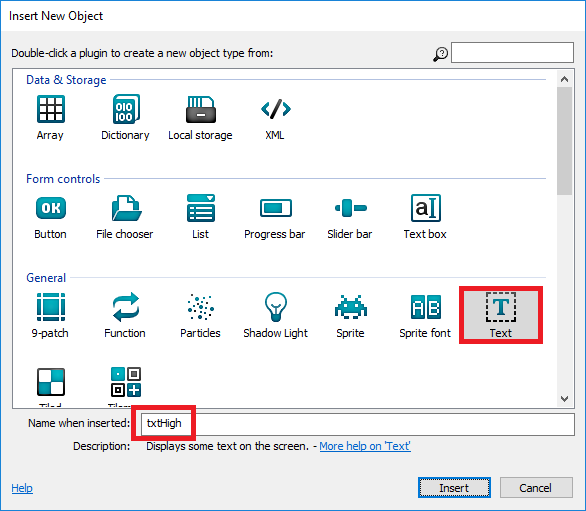
Insert another text object name it txtHigh.
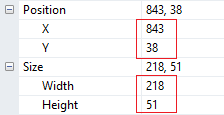
Set size and position for txtHigh as follows:
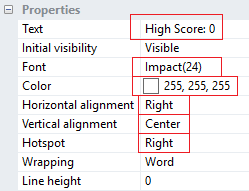
Set other properties as follows:
The best place to add the score is when the arrows hit the destroyer and destroyer2 objects.
Click Add action in the Arrow-Overlapping destroyer group: System → Add value → Specify score as variable and 1 as value.
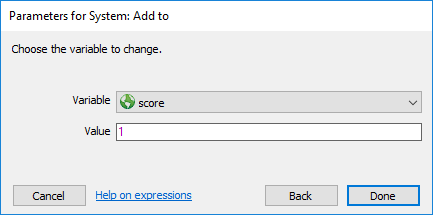
Copy this and past it in the Arrow-Overlapping destroyer2 group.
Our final 2 event groups should look like this:

Go to the Every tick event group → Add action → Select txtScote → Set text and specify: “Score: “ & score as value.
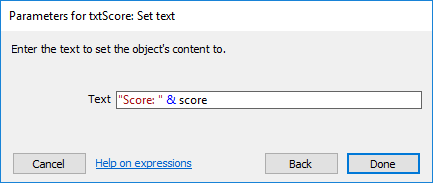
Try the game – whenever you avoid an arrow your score should go by 1.
Add the death animations.
When the player dies and the arrowside=0 (Left-Upper arrow) – we must play the following animation.

And when player dies and arrowside=3 (Left-lower arrow) – we must play the following animation.

For the other 2 cases:
ArrowSide=1 is like the animation of 0 but mirrored.
ArrowSide=2 is like the animation of 3 but mirrored.
Right-click anywhere in the gameLayout and select Inert new object – Select Sprite and name it die.
Click anywhere on the screen to open the Edit image windows. Click on the Default animation and name it: Die_left_high.
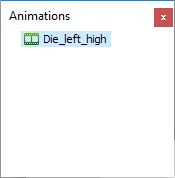
Click on the Load an image from a file button and select Die_left_high1.png
Right-Click in the Animation frames window and select Add frame.
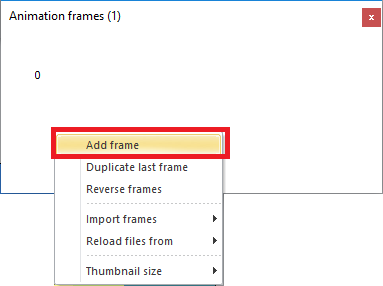
Load for this frame Die_left_high2.png
Repeat the creation of the frame and load: Die_left_high3.png
When you finish the 3 frames your Animation frames window should look like this:

Right-click on the Animation window and click Add animation.
Name this new one: Die_left_low, and in a similar way add 3 frames and load Die_left_low1.png, Die_left_low2.png and Die_left_low3.png in frames 0,1,2.
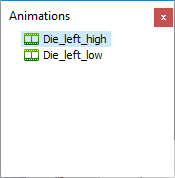
Make sure that for the Die_left_high and Die_left_low animations the loop property is set to NO.
Close the Edit image window.
Set the Size of the die sprite to (128,109) and the position to (399, -183).
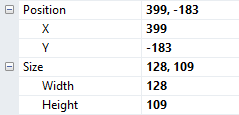
We want to spawn from the location of the player (when he is destroyed) the die animation based on the arrowSide value.
Click Add event → Select player → On destroyed.
Right-click on this created event and select – Add sub-event → System → Compare variable → Select arrowSide as variable and equal to and zero.
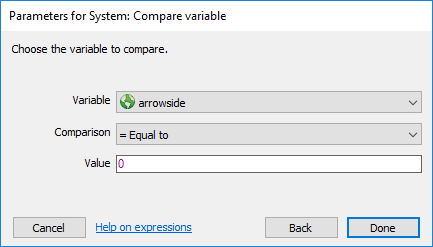
Copy the arrowSide=0 line and past it 3 times then change the value to 1,2 and 3 for the 2nd, 3rd and the 4th copies.
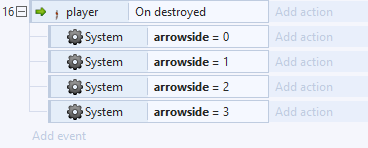
Click on the Add action of arrowside=0 → System → Create Object → Specify die as Object to create and specify player.X for X value and player.Y for Y value.
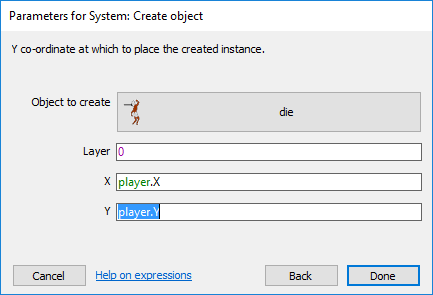
Click on the Add action below it → Select die → Set animation – Specify “Die_left_high”
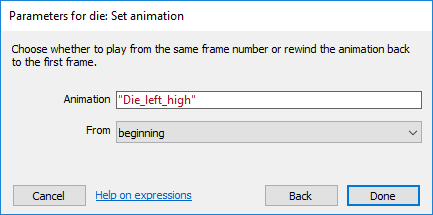
Copy the line of Create object (of arrowside=0 line) and past it in the lines of arrowside =1,2,3.
Copy the line of die (arrowside=0 line) and past it to arrowside=1,2,3 lines.
Click edit on the die line pasted for arrowSide 2 and 3 and change the “Die_left_high” to “Die_left_low”
Click on the Add action (of arrowside=1) → Select die → Set mirrored.
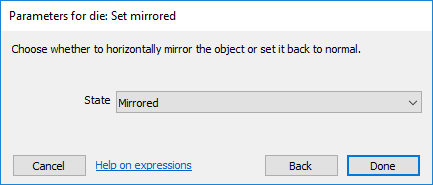
Similarly click on the Add action (of arrowSide=2) → Select die → Set mirrored.
Our complete player-On destroyed event group should look like this:
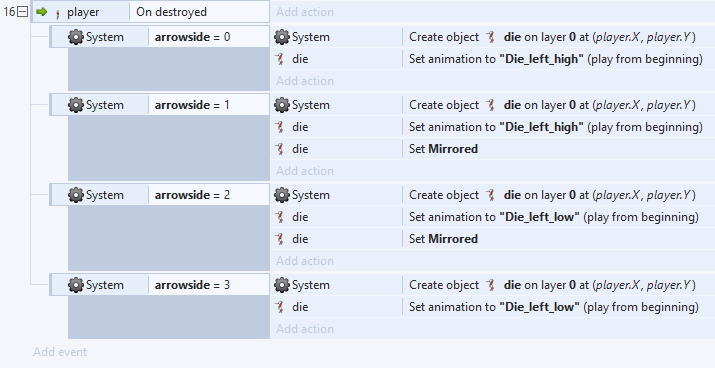
When player dies we want to check if current score is greater than highScore, if so we want to update the value of highScore with score value.
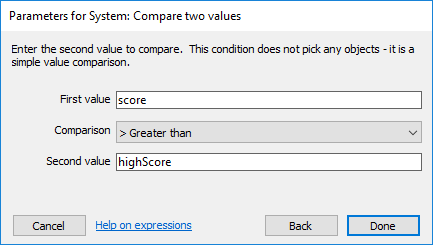
Right-Click on the player-On destroyed line → Add → Add sub-event → Select system → Compare two values – Specify score for First value, > Greater than for comparison and highScore for Second value.
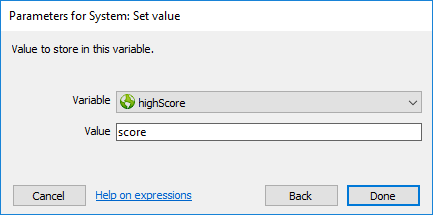
Click Add action → System → Set value → Select highScore for variable and score for value.
Let us create our start screen.
In the project list, Right-click the Layout group and select Add Layout – Select the Add event sheet option.
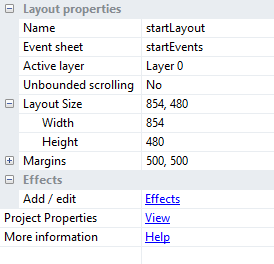
Name this Layout 1 → startLayout and specify it size to be 854 by 480.
Right-click on Event sheet 1 in Project hierarchy and rename it to startEvents
The Layout property should look like this:
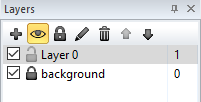
Go to the Layer tab and rename Layer 0 – background.
Right-click anywhere → select Insert new object → Select sprite and name it bg.
Load the background.png picture and make sure that it is centered (427,240).
Lock the background layer.
Click on the + sign in the Layers window to add a new layer (name it whatever you want).
Select the new layer and in the layout → Insert new object → Select sprite → Name it button give it any color you want. Resize it so that it covers the word PLAY.
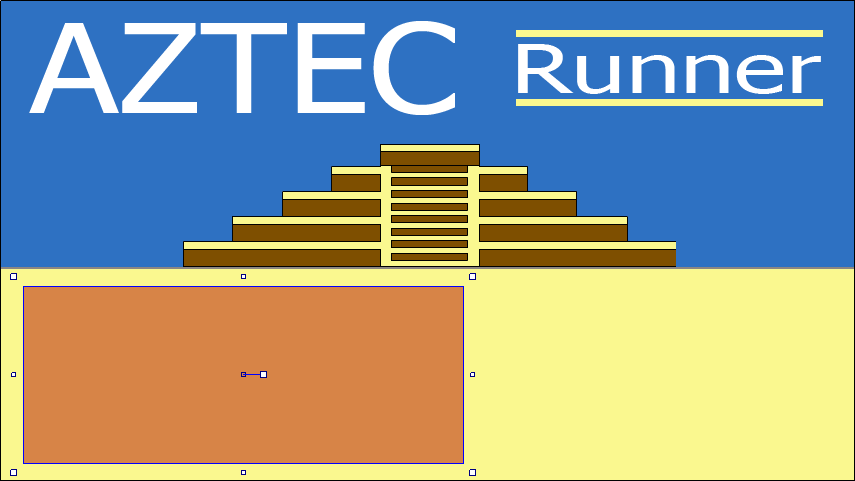
In the property window set opacity=0.
We want to add the high score text here.
Right-click Insert new object → Select text → Name it txtHighScore.
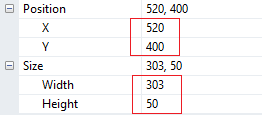
Set its position and size to:
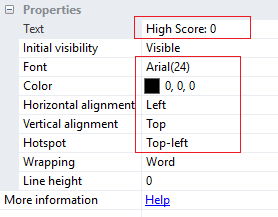
And set other properties to:
Click on the Add event link in the startLayout.
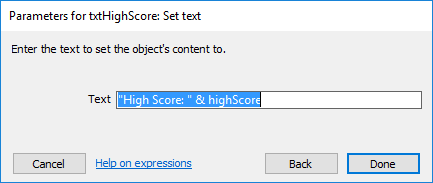
Select System → On start of layout → select txthighScore → Set text → Specify value “High Score: “ & highScore.
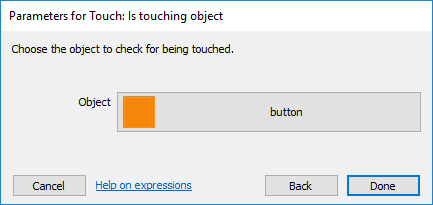
Click Add event again → Select touch → Is touching object → Select button.
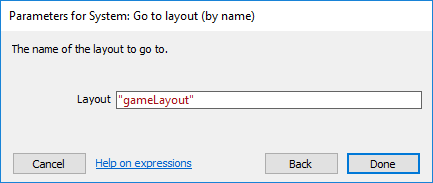
Click on the Add action next to it → Select System → Go to layout (by Name) – specify “gameLayout”
At this stage when you run the game you should see the startLayout and when you click on the PLAY it should take you to the game.
Let us go back to the gameLayout.
When the player is destroyed – we played the animation(die), adjusted the highScore if needed – We want to wait 3 seconds and go back to the startLayout.
So right-click on the player-On destroyed event → Add → Add blank sub-event.
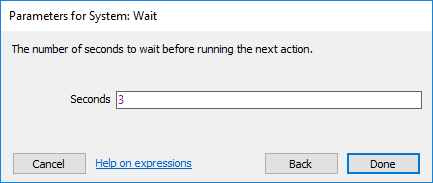
Click on the Add action of this blank sub event → System → wait and specify 3 seconds.
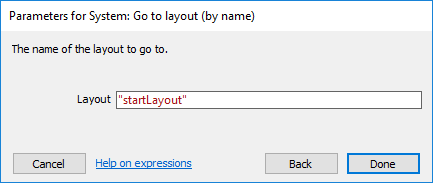
Click on Add action again → System → Go to Layout (by name) and specify: startLayout
Our blank sub-event should look like this:

To Finish up – always a good idea to reinitialize all variables in the On start of layout event.
Click on Add action in that event each time and do the following:
System → Set value → Select score – set value 0.
System → Set value → Select isAlive – set value 1.
System → Set value → Select arrowSide – set value=0
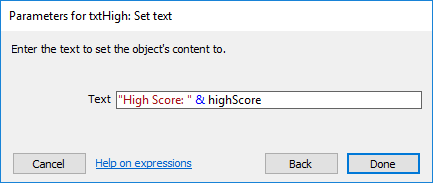
txtHigh → Set text → value “High Score: “ & highScore
Stand → Set opacity à Set value 0.
TouchLeft à Set opacity → Set value 0.
TouchRight → Set opacity → Set value 0.
Our complete On start of layout should look like this:
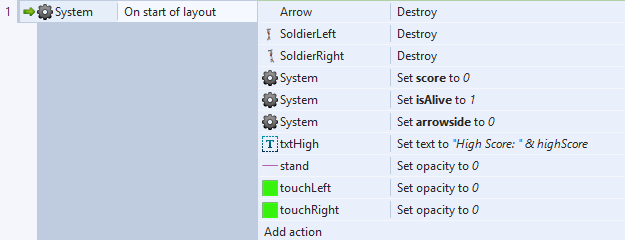
We want to add instructions to the user. Right-click → Insert new object → Select text → Name it txtinstructions.
Set the text property to: Use up arrow (or tap on the left of the screen) to jump or down arrow(or tap on the right of the screen) to duck to avoid the arrows.
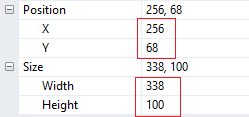
Set size and position of txtinstructions to:
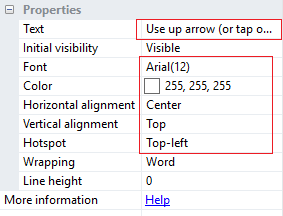
Set other properties as follows:
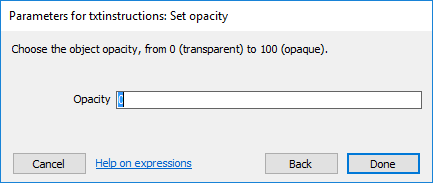
If you want to hide these instructions after certain time – go to the Delay<= 0 event group and in the first Add action → txtInstructions → Set opacity → Specify value 0.
We are done – Run and enjoy the game.

